参考:https://juejin.im/post/5d27f84a6fb9a07ed064ddf1
https://zhuanlan.zhihu.com/p/51894196
进阶篇:2020-02-18 自定义 changelog 及自动化 github-release
2022-06-15 更新
目前更推荐使用 conventional-changelog-cmyr-config,链接:https://github.com/CaoMeiYouRen/conventional-changelog-cmyr-config
使用方法:
npm i commitizen cz-conventional-changelog conventional-changelog-cli conventional-changelog-cmyr-config -D
然后在 package.json 中配置参数,不填配置的话则会按照预设模版生成 CHANGELOG
具体配置项请参考 conventional-changelog-cmyr-config 的 README.md 此处不再赘述。
最后执行
conventional-changelog -p cmyr-config -i CHANGELOG.md -s -r 0
此外,建议搭配 cz-conventional-changelog-cmyr 使用
2020-02-18 更新
之前要手动配置毕竟不爽,因此草梅将 conventional-changelog-custom-config fork 了一份,添加了一些自己的改动并发布到 npm 上了,包名是conventional-changelog-cmyr-config。使用方法也是类似的,即:
npm i conventional-changelog-cmyr-config -D
conventional-changelog -p cmyr-config -i CHANGELOG.md -s -r 0
移除原有的配置文件,改为从包中获取配置。
2020-01-02 更新
最近去搜了下, 讲如何自定义配置的依旧只有我这一篇文章,结果就是在谷歌上的权重还挺高的 hhh
2019-12-23 原文
2019 年 7 月在写一个小项目的时候用到过 conventional-changelog 这个工具来自动生成更新日志。
虽然对 git commit 的格式约束严格了,也就是不能随心所欲的提交代码了。但对于后期的自动生成更新日志来讲,以及对于整个团队协作,项目的开发来讲是十分划算的,可以节省下大把写更新日志的时间,免得自己都忘了更新了啥。【看没有格式的 git commit ,真的不要太痛苦】
主要的用法在两个参考链接中有提,因此本文就重点讲一下如何自定义 changelog。
首先还得感谢https://juejin.im/post/5d27f84a6fb9a07ed064ddf1 这篇文章。教会了我很多东西。
这篇文章的作者还写了一个 conventional-changelog-angular 的预设扩展项目地址 。正是这个项目让我搞明白了怎么自定义。
自定义的关键,显然就在根目录的 changelog-option.js 文件,观察这个文件后,发现正是这个文件定义了哪些 git commit 要写入更新日志,以及生成日志的每块内容的标题。
例如,如果我只关注 feat(新功能) 、fix(Bug 修复) 、perf(性能优化)、revert(回退),那么我就可以在配置中这样写。
 module.exports = {
    writerOpts: {
        transform: (commit, context) => {
            if (commit.type === 'feat') {
                commit.type = '✨ Features | 新功能'
            } else if (commit.type === 'fix') {
                commit.type = '🐛 Bug Fixes | Bug 修复'
            } else if (commit.type === 'perf') {
                commit.type = '⚡ Performance Improvements | 性能优化'
            } else if (commit.type === 'revert' || commit.revert) {
                commit.type = '⏪ Reverts | 回退'
            }
            return
        }
这样一来就只会生成需要的日志而不会生成其他的日志。
而聪明的读者肯定也观察到了,commit.type 正是我们需要改动的标题
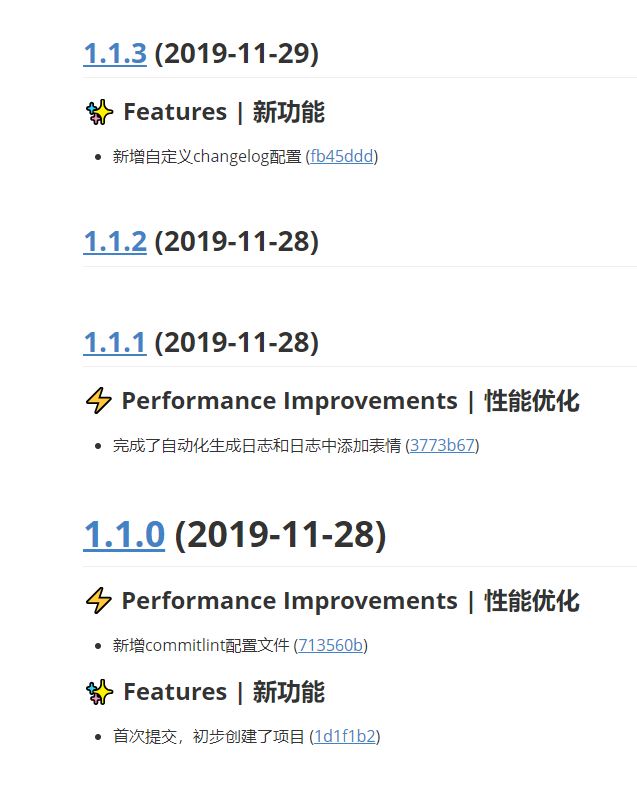
用这种方法生成的日志参考图
完整的 changelog-option.js 如下
const compareFunc = require('compare-func')
module.exports = {
writerOpts: {
transform: (commit, context) => {
let discard = true
const issues = []
commit.notes.forEach(note => {
note.title = 'BREAKING CHANGES'
discard = false
})
if (commit.type === 'feat') {
commit.type = '✨ Features | 新功能'
} else if (commit.type === 'fix') {
commit.type = '🐛 Bug Fixes | Bug 修复'
} else if (commit.type === 'perf') {
commit.type = '⚡ Performance Improvements | 性能优化'
} else if (commit.type === 'revert' || commit.revert) {
commit.type = '⏪ Reverts | 回退'
} else if (discard) {
return
} else if (commit.type === 'docs') {
commit.type = '📝 Documentation | 文档'
} else if (commit.type === 'style') {
commit.type = '💄 Styles | 风格'
} else if (commit.type === 'refactor') {
commit.type = '♻ Code Refactoring | 代码重构'
} else if (commit.type === 'test') {
commit.type = '✅ Tests | 测试'
} else if (commit.type === 'build') {
commit.type = '👷 Build System | 构建'
} else if (commit.type === 'ci') {
commit.type = '🔧 Continuous Integration | CI 配置'
} else if (commit.type === 'chore') {
commit.type = '🎫 Chores | 其他更新'
}
if (commit.scope === '*') {
commit.scope = ''
}
if (typeof commit.hash === 'string') {
commit.hash = commit.hash.substring(0, 7)
}
if (typeof commit.subject === 'string') {
let url = context.repository
? `${context.host}/${context.owner}/${context.repository}`
: context.repoUrl
if (url) {
url = `${url}/issues/`
// Issue URLs.
commit.subject = commit.subject.replace(/#([0-9]+)/g, (_, issue) => {
issues.push(issue)
return `[#${issue}](${url}${issue})`
})
}
if (context.host) {
// User URLs.
commit.subject = commit.subject.replace(/\B@([a-z0-9](?:-?[a-z0-9/]){0,38})/g, (_, username) => {
if (username.includes('/')) {
return `@${username}`
}
return `[@${username}](${context.host}/${username})`
})
}
}
// remove references that already appear in the subject
commit.references = commit.references.filter(reference => {
if (issues.indexOf(reference.issue) === -1) {
return true
}
return false
})
return commit
},
groupBy: 'type',
commitGroupsSort: 'title',
commitsSort: ['scope', 'subject'],
noteGroupsSort: 'title',
notesSort: compareFunc
}
}
最后在 package.json 中的 scripts 添加一条语句
 "changelog": "conventional-changelog -p custom-config -i CHANGELOG.md -s -r 0  -n ./changelog-option.js"
//在这指定配置文件位置,本人放在了根目录,也可以指定其他地方
/*配置项说明:
-p custom-config 指定风格
-i CHANGELOG.md 指定输出的文件名称
-s -r 0 指定增量更新,不会覆盖以前的更新日志
-n ./changelog-option.js 指定自定义配置
*/
注意本项目中用到了 custom-config,因此需要先安装 custom-config【单纯的 changelog-option.js 是不完整的配置,在此只修改了自己需要的部分,其他部分默认】
npm i conventional-changelog-custom-config -D
最后运行
npm run changelog
即可
这就是关于如何自定义 conventional-changelog 的方法了。之前上百度、谷歌都有搜过,但没有一个教程是讲如何自定义日志的。为了防止以后忘了,因此记录。
- 本文链接: https://wp.cmyr.ltd/archives/how-to-customize-a-traditional-change-log
- 版权声明: 本博客所有文章除特别声明外,均采用 BY-NC-SA 许可协议。转载请注明出处!
欢迎关注我的其它发布渠道
发表回复
要发表评论,您必须先登录。